

Authenticate an email domain
Owners and administrators can authorize CXP to send customer replies and internal notifications from their organization’s email domain in Settings > Email Management > Domain Authentication. For example, authenticateexample.com before choosing help@example.com as a
Default From Address. You need someone who can edit that domain’s DNS records.
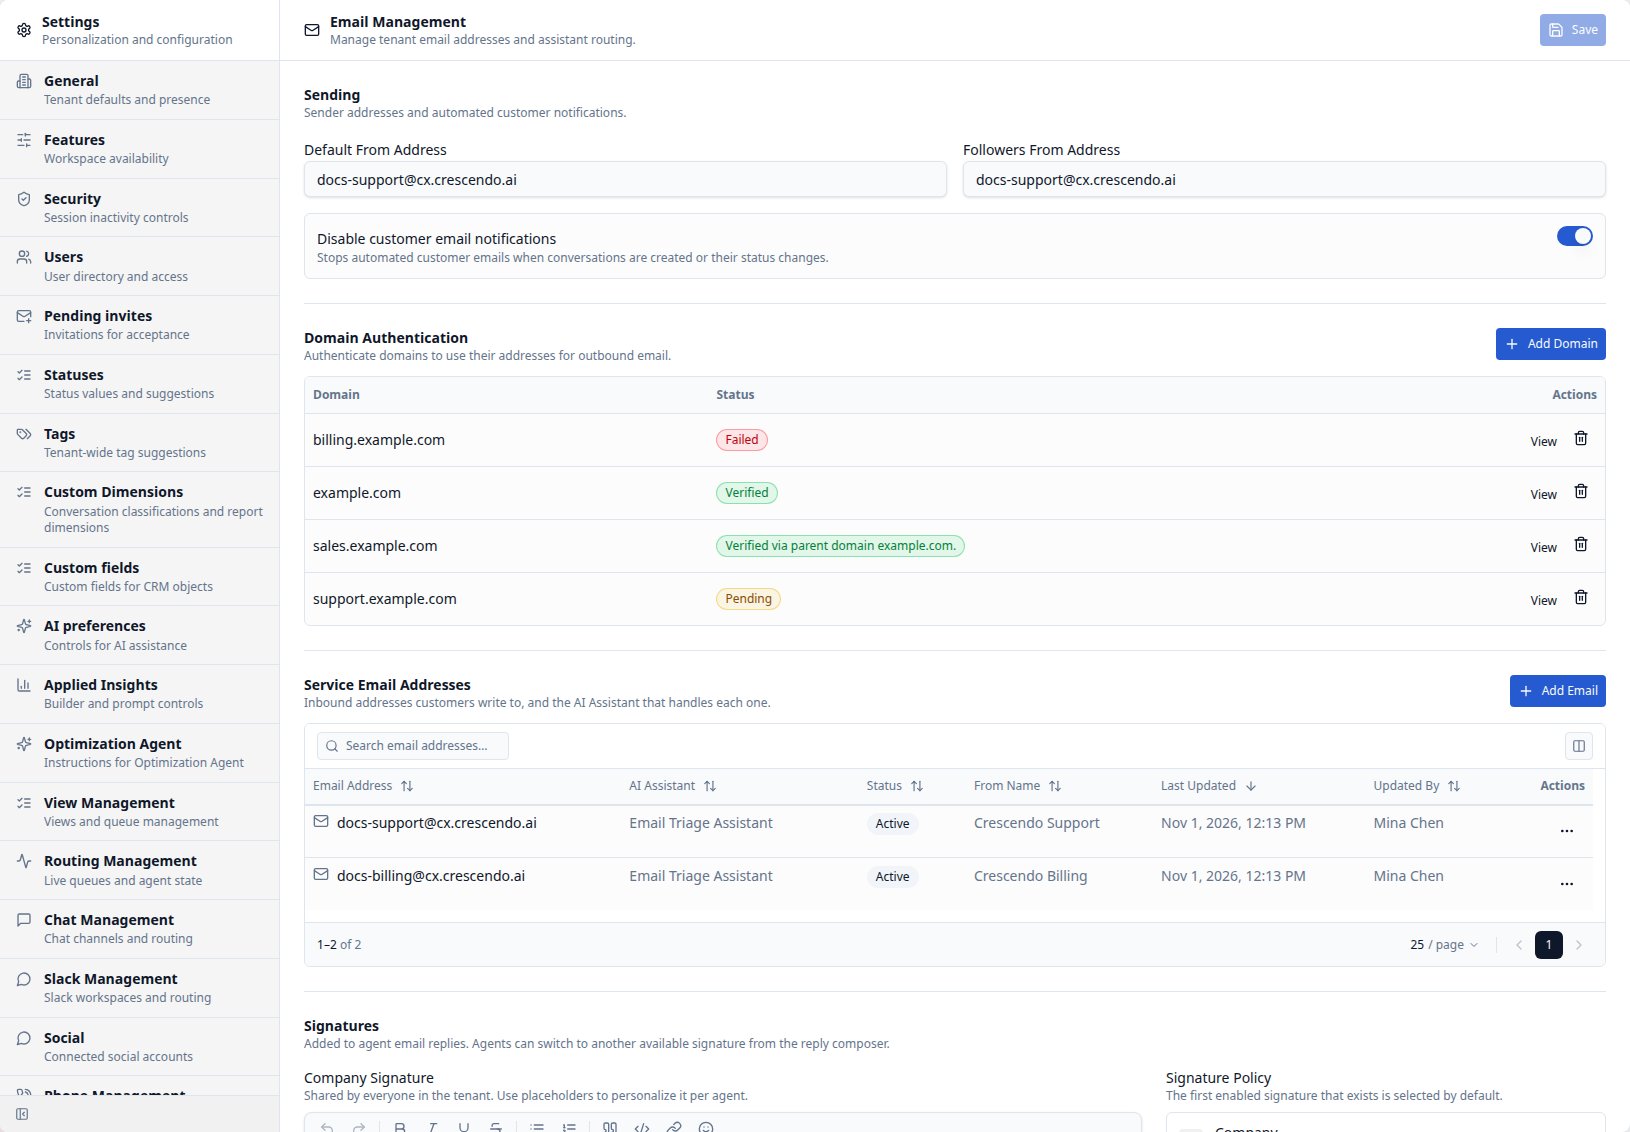
Add a domain
- Select Add Domain, enter the domain, such as
example.com, and select Submit. Enter the domain without a mailbox orhttps://prefix. - If CXP finds an existing authentication, confirm that your tenant is authorized to use it. CXP reuses that authentication. Multiple tenants may use one domain.
- The dialog shows both setup steps. Select Copy instructions to copy the formatted instructions and share them with your domain administrator. Rich editors receive a formatted table; Markdown editors receive Markdown headings, numbered steps and a table.
- Select Done to close the dialog. View shows the current DNS data and Verify action, without repeating the setup instructions.
Step 1: Configure DNS
Your domain administrator adds the CNAME records using the exact Host and Value shown in the dialog. If the DNS service automatically appends the domain, enter only the host portion it requires. The dialog also shows any available DMARC TXT instructions. Keep an existing valid policy. If no policy exists, the domain administrator can create the suggested record. A failed check requires review; it does not mean an existing policy should be overwritten. If information is unavailable, use Retry to load instructions again rather than guessing a value.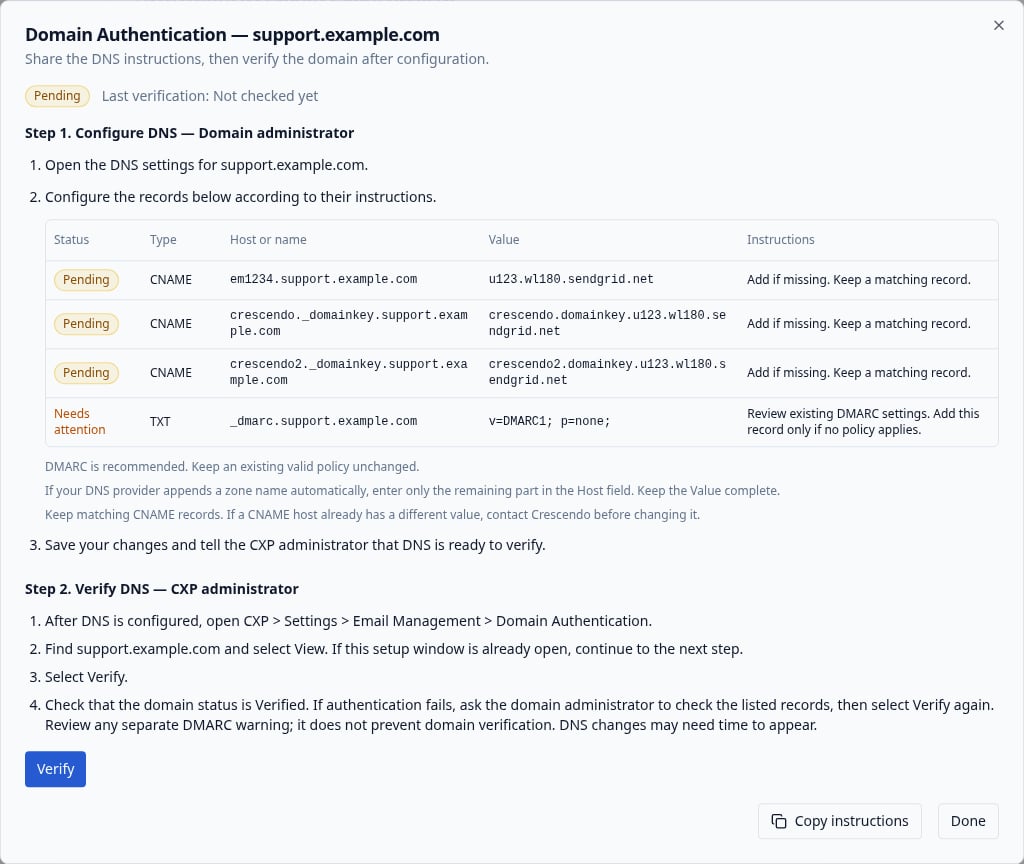
Step 2: Verify in CXP
- After the domain administrator saves the records, return to Settings > Email Management > Domain Authentication.
- Select View beside the domain, then select Verify.
- Review the result. If a check fails, compare the DNS entries with the displayed DNS data, allow time for DNS changes to become visible, and select Verify again.
Existing domains and changes
When you first open the updated page, CXP finds the authentication for each previously configured trusted domain. If all lookups succeed, the table replaces the old editor. A domain with no authentication appears as Pending; select Add Domain and enter that domain to set it up. If discovery cannot finish, existing settings remain active and the page offers Retry. When an existing sending domain uses a verified parent authentication, its status says Verified via parent domain example.com. CXP retains the configured subdomain and displays the parent’s existing DNS records. Previously unresolved domains are checked again when you open this page. After initialization, Pending and Failed domains are unavailable for new outbound email. Receiving continues, and already prepared emails keep their original sender. Saved sender fields remain visible so you can correct or clear them.Remove a domain
You can remove a domain in Pending, Failed or Verified state. Select Delete and confirm. First change and save any tenant Default From Address, Followers From Address, or channel default that uses the domain, including defaults on disabled channels. CXP lists these dependencies when removal is blocked. Removal affects this tenant’s configuration. It leaves the provider authentication and DNS records in place, including when another tenant uses the same domain.Configure forwarding separately
Domain authentication authorizes outbound sending. To receive messages sent tohelp@example.com, configure forwarding in your email service to the CXP service
address. CXP does not change forwarding rules in your mailbox. Follow
Configure an email channel and send a
test message to check both receiving and replies.